Reader
Reader is an application that helps visualize the impact of different configurations and parameters for document digitization. It can independently execute on an input dataset using the configured params in the UI and produce digitization output as .ibdoc files.
Input
Reader takes a folder as input that contains all the files to be processed and a name for the project.
Supported file types include: bmp, csv, docx, eml, gif (single frame), html, ico, jpeg, jpg, mht, mhtml, msg, pdf, png, ppt, pptx, raw, tif, tiff, txt, xls, xlsx.
Output
Reader produces the project directory alongside the input folder directory. Inside this project directory it creates:
<project_name>.ibreaderfile which contains all the configuration and settings for your projectread_resultdirectory where all the output.ibdocfiles are stored
See also: File types in Instabase
Getting started
To start using Reader, open the Reader app and create a new project.
Creating a project
To create a Reader project, click the Create New Project button.
The Create Reader Project modal will open. Browse your input folder path, enter a project name and click ‘Create Project’.
The app will create the <project_name>.ibreader file with default configuration in the project directory and will redirect to the Document View.
Opening an existing project
To open an existing Reader project, either:
- Click any
.ibreaderproject file from the File System or - Open the Reader app, select Open Existing Project, and then browse your project file
App Layout
The Document View of the Reader app contains two sections:
- The left sidebar, containing the Documents panel, which is used for navigating between different input documents.
- The central Split View which shows the image and text output of the selected document side by side.
The sidebar is collapsible. To collapse or expand a sidebar, use the Collapse icon on the top-right corner of the sidebar.
Split View
The central Split View shows the pages in image format on the left side and the corresponding text on the right. The scroll between image and text views is synchronized, so the same page is always visible in both views.
The top toolbar contains the controls for Zooming, Panning, Fit to View, Reader Controls, and Lens mode.
Reader Controls
The Reader Controls section contains the Run and Settings buttons
Lens Mode
Lens mode makes it effortless to find the text output of any word or line.
To use Lens mode, select Word or Line from the Lens dropdown in the Split View toolbar. When a Lens mode is selected, the bounding boxes for all words appear in the page image. Selecting any word in the image during Lens mode will highlight its corresponding Word/Line on the text view.
Entities Panel
Entities are visual elements in documents. Reader currently supports Table of Contents Segmentation entities. Entities can be populated by updating the entities settings. When entities are populated you can search or click on an entity to auto-scroll to that entity.
Running Read Operation
Read is automatically performed when creating a new reader project and when the output directory is empty. To run read manually, click the read button in the Profiles panel.
Read Settings
To open the settings modal, click on the settings icon in the Profiles panel.
Settings modal contains General, Read, and Entity settings tabs. Changing any setting and clicking on the Save and Run button will save the updated config to the .ibreader file and run the read operation with updated settings.
General Settings
This tab contains options to change the input folder or apply a Predefined Configuration
Reader currently supports Model Training and Table Extraction predefined configurations.
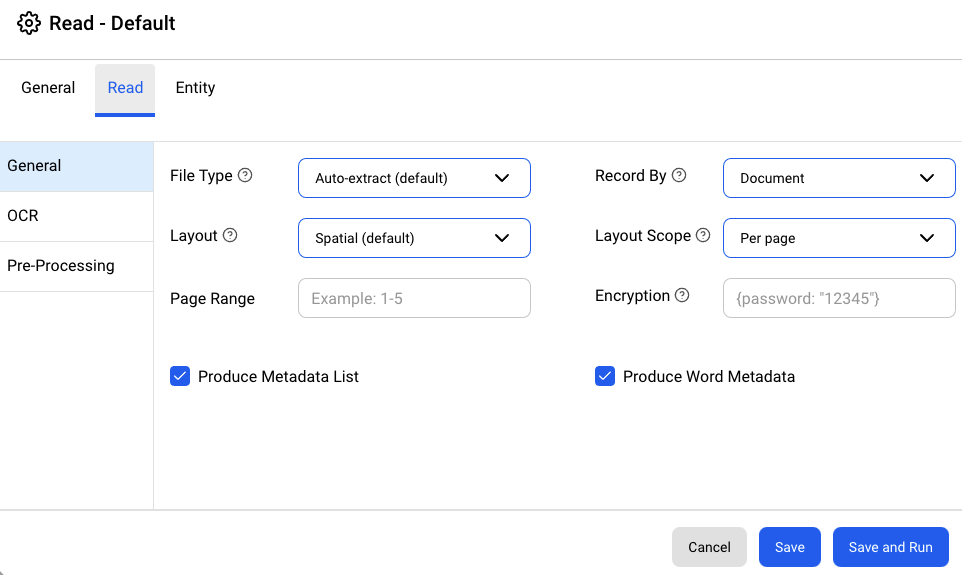
Read Settings
The Read tab contains all the read configuration inputs and flags.
Entity Settings
The Entity tab contains settings to enable and configure Entity generation models. Supported Entity models are shown on the left panel.
Example, for checkbox detection, click the corresponding label on the left panel and select Enable Checkbox Detection.
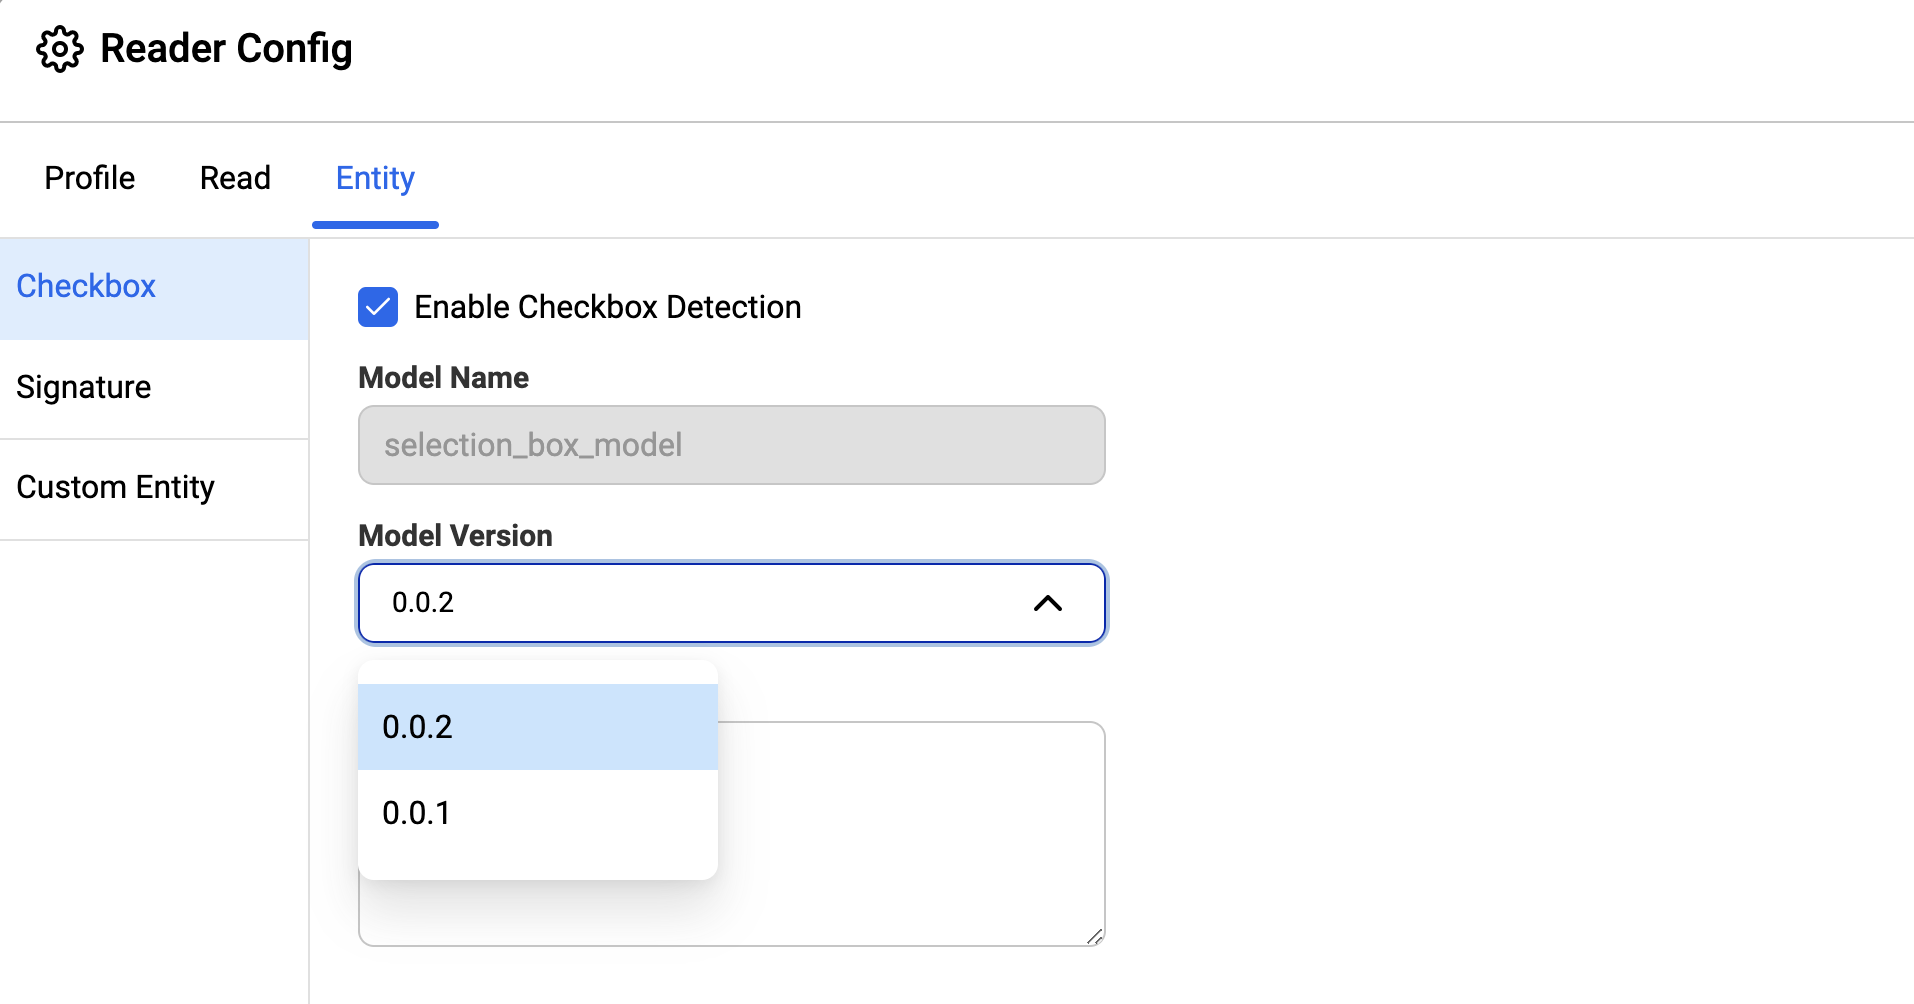
When enabled, checkbox detection shows the model name and the model version selected. By default, it selects the latest checkbox model, which is sufficient for most use cases. You can select the older model version if needed.
After you save and rerun the Reader with updated settings, the newly detected entities are shown in the output ibdocs:

Supported entity models
| Model | Description |
|---|---|
| Checkbox | For Checkbox Detection |
| Signature | For Signature Detection |
| Barcode | For Barcode and QRcode Detection |
| Table | For Table Detection |
Custom entity model
You can configure and run custom entity models in the Reader.
First, create and publish your custom entity model.
-
-
The model request has
input_documentwhich contains the document page image bytes. -
Ensure that the model creates the detected entities in the form of
List[DetectedEntity]and adds them to theDetectionResult.
-
Example Model:
import io

from typing import Any, Callable, List

from google.protobuf import json_format
from PIL import Image

from instabase.model_service.model_cache import InvalidModelRequest, Model
from instabase.protos.model_service import model_service_pb2
from instabase.protos.doc_types import core_types_pb2


class CustomModel(Model):
  """Defines a model that can be called."""

  def load(self) -> None:
    """Loads the model - for example, read a file, create a neural network
    object, and so on. Important: All loading must occur here. Use the
    `cleanup()` method to remove from memory everything that is loaded here.
    """
    self.model = load_weights('path/to/weights.pt')

  def cleanup(self) -> None:
    """Cleans up any objects from memory related to this model, such as objects
    loaded inside the `load()` method.
    """
    self.model = None

  def validate_request(self,
                        request: model_service_pb2.RunModelRequest) -> None:
    """Validates the request so it contains all the necessary values."""
    if not request.HasField('input_document'):
      raise InvalidModelRequest(
          'input_document not provided within RunModelRequest')
    if not request.input_document.HasField('content'):
      raise InvalidModelRequest(
          'content field not provided within input_document of RunModelRequest'
      )

  def run(self, request: model_service_pb2.RunModelRequest) -> model_service_pb2.ModelResult:
    """This is the actual logic that defines how this model is run."""
    bytes_io = io.BytesIO(request.input_document.content)
    pil_image = Image.open(bytes_io)
    processed_image = preprocess_image(pil_image)

    # Run the model.
    predictions = self.model(processed_image)

    # Create Entities from predictions.
    found_entities = [
      model_service_pb2.DetectedEntity(
        content='[{}]'.format(pred[0]),
        label=pred[0],
        bounding_box=core_types_pb2.Rectangle(
          top_x=pred[2],
          top_y=pred[3],
          bottom_x=pred[4],
          bottom_y=pred[5]
        ),
        score=pred[2]
    ) for pred in predictions]

    # Finally, we return the actual result of the model
    return model_service_pb2.ModelResult(
      detection_result=model_service_pb2.DetectionResult(
        entities=found_entities
      )
    )
After your model is packaged and published to the Marketplace, enable the custom model in entity settings.
-
Under the Entity tab, click the Custom Entity label on the left panel.
-
Click Add New Entity.
-
Type the published model name and click Add
- If that model is published in the Marketplace, then it shows the latest model version number, and you can change the version if required.
-
Save the model by clicking on Add Custom Entity.
-
Rerun the Reader with the updated settings. The newly detected entities are shown in the output file
ibdocs. To remove or disable the custom entity model, click on thexicon.
Use entity models in a flow
There are three ways to enable entity models in the flow, using the process files step:
-
Use an existing Reader module (recommended).
-
Create and configure a new Reader module.
-
Update the OCR configuration.
Use an existing Reader module
We recommend enabling entity models by using an existing Reader module.
-
In the Flow editor, under the Modules tab, click the
+icon and select Reader Module > Import module to select and import the Reader configuration from your Reader or ML Studio project. This adds the Reader module in the Modules panel. -
Select the process files step ,and change the Use Reader Module parameter to True.
-
In the Reader Module parameter, select the Reader module created in the previous steps.
Create a new Reader module
-
In the Flow editor, under the Modules panel, click the
+icon and select Reader Module > Create new module to add a new Reader module. -
Type the module name and click Create new module. This adds a new Reader module with default Reader settings in the Modules panel.
-
In the Modules panel, click
reader.ibreaderunder the added Reader module. This opens Reader in a new tab. -
In Reader, cancel the prompt for selecting the input path. Click the gear icon to open the Reader configuration.
-
In the Reader configuration, you can enable and configure the entity models as explained in Entity Settings section.
-
Click Save and close Reader to save the configuration.
-
In the Flow editor, select the process files step, and change the Use Reader Module parameter to True.
-
In the Reader Module parameter, select the Reader module created in the previous steps.
Update the OCR configuration
-
In the Flow editor, select the process files step, and click Edit under the OCR Config parameter.
-
Enable the Show advanced view toggle.
-
In the Advanced view, add the configuration for entity models. For example, to run version
0.0.3ofselection_box_modeladd this config:
"entity_models": [
  {
    "model_name": "selection_box_model",
    "model_version": "0.0.3",
    "params": {}
  }
]
Supported file types
For more information about supported file types, see the digitization support reference documentation.